Serving Static Site from S3 Bucket over HTTPS with CloudFront
Overview
This tutorial follows on from Deploying a static site on AWS. I will go through how to configure the site, that we set up in the last tutorial, to be served over HTTPS.
Related Tutorials
- Creating a static website using Jekyll (coming soon).
- Deploying a static site on AWS.
- Serving Static Site from S3 Bucket over HTTPS with Cloudfront (this tutorial).
- Automating the deployment of a static site using Github Actions (coming soon).
Prerequisites.
- A site being served from an S3 bucket. See Deploying a static site on AWS.
- Domain in Route53.
Tutorial
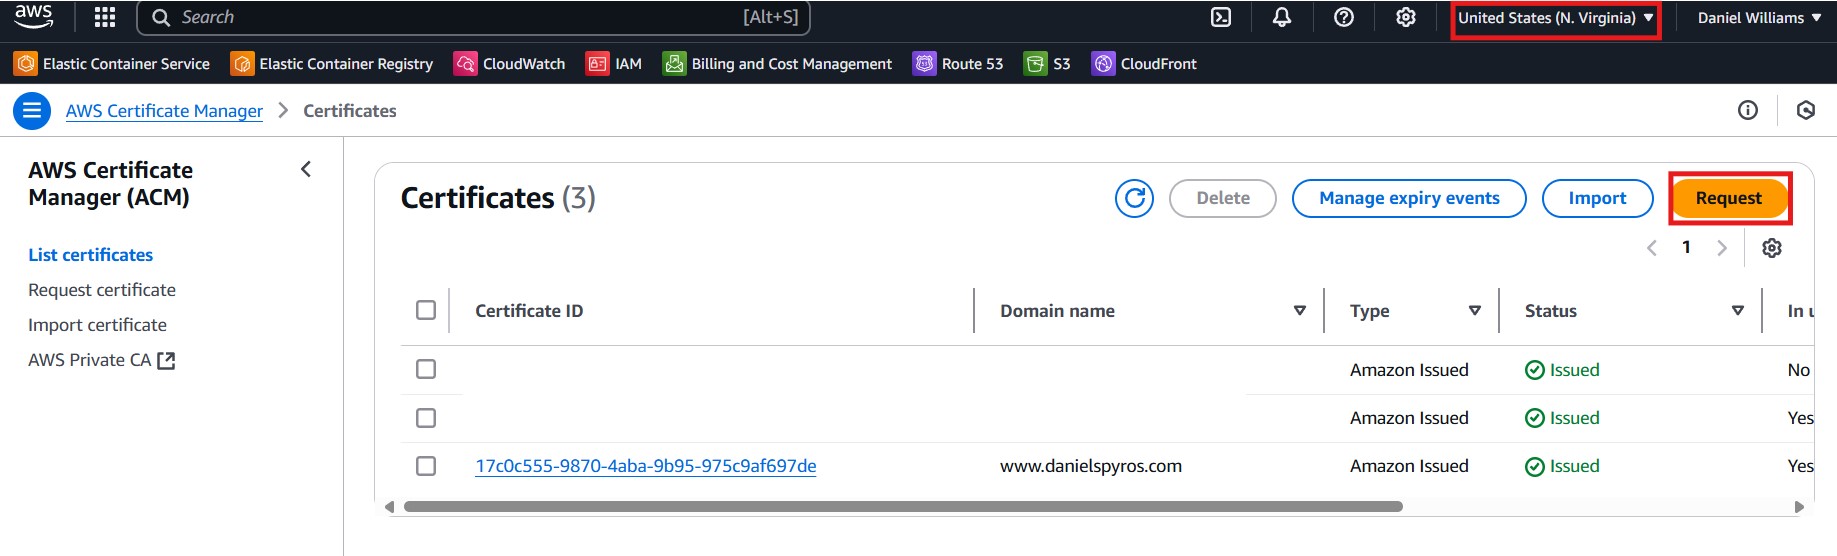
1. Requesting a certificate
Go to the AWS Certificate Manager and select the us-east-1 (N. Virginia) region. You must create it in this region to be able to link it to a the CloudFront distribution that we will create afterwards.
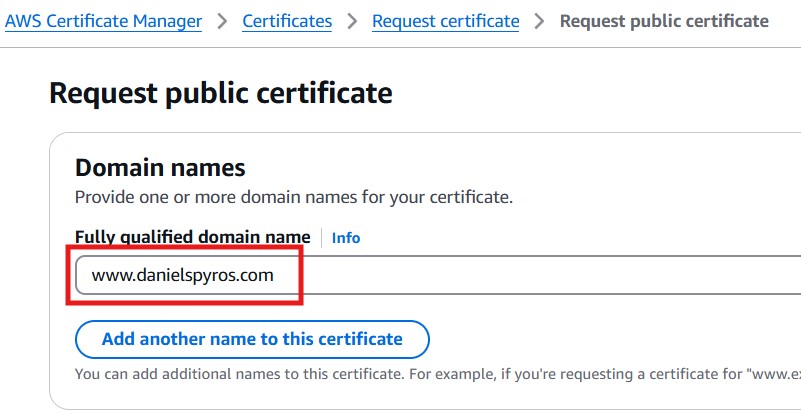
Request a new public certificate. Click Next, then enter the fully qualified domain name:
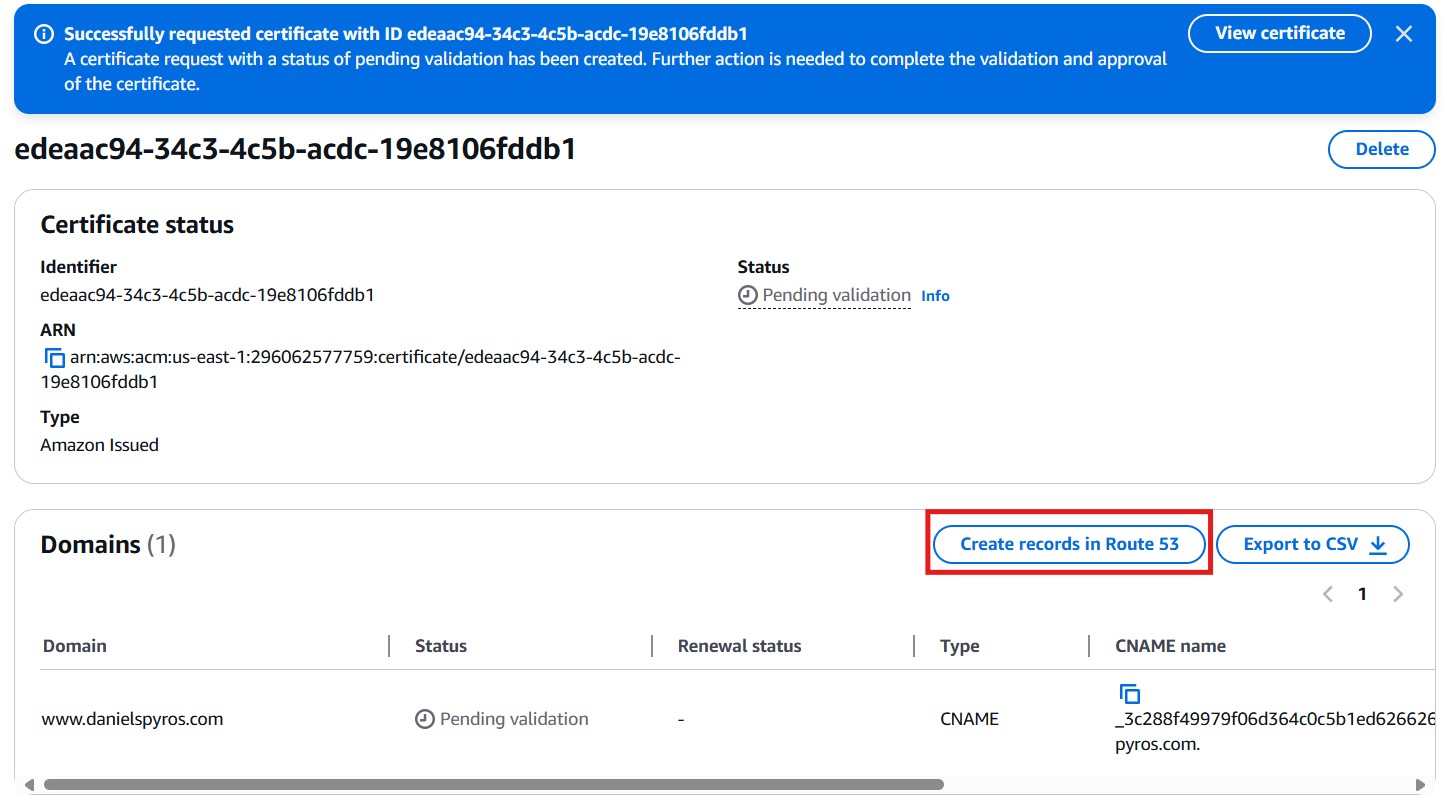
This will create the certificate request. Now you need to create the records in Route 53.
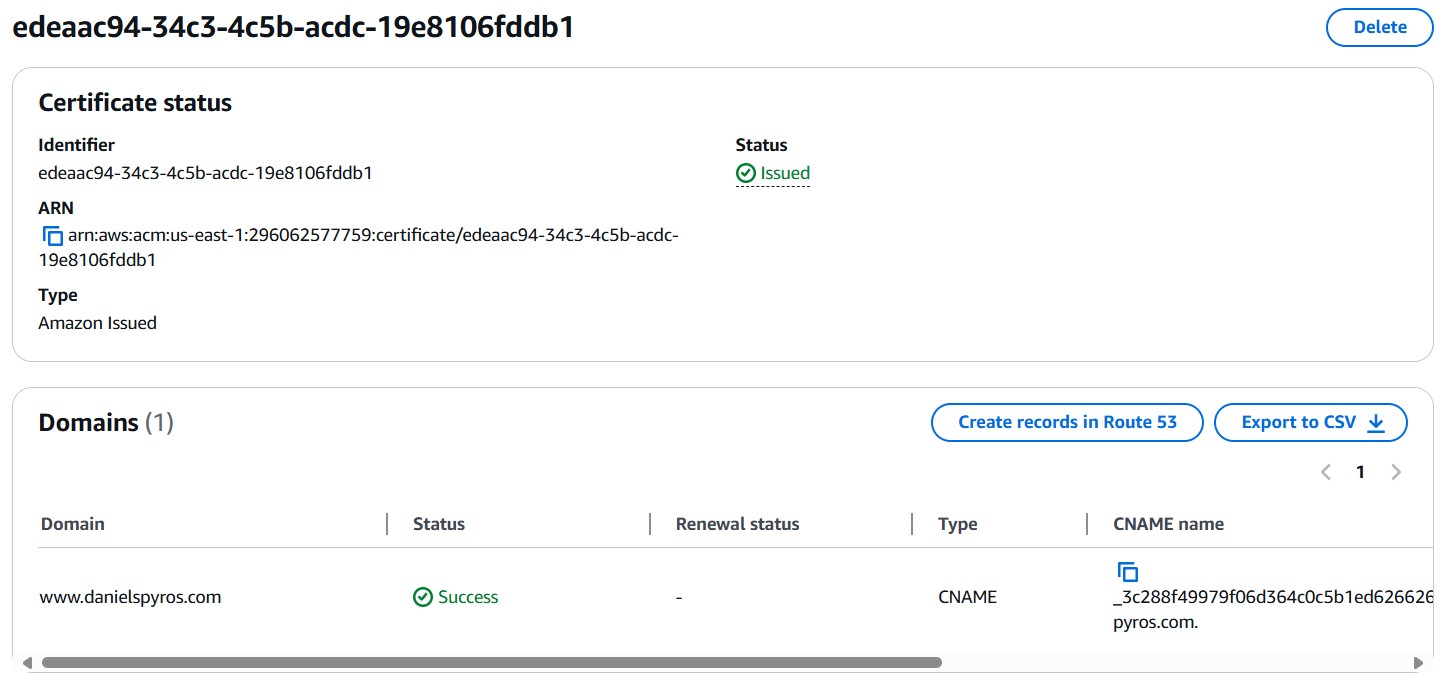
Once the records are created in Route 53, wait a couple minutes and refresh the certificate page. You should see that it is now issued.
2. Creating CloudFront distribution
On the AWS console, go to CloudFront and create a new distribution.

Select your S3 bucket domain as the Origin.
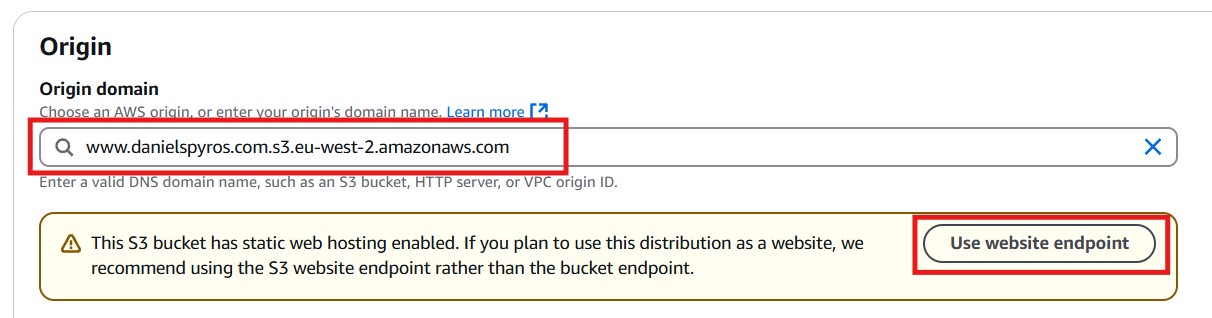
Click the use website endpoint. This will change it to www.danielspyros.com.s3-website.eu-west-2.amazonaws.com.
Leave the prortocol on “HTTP Only” and HTTP port 80.
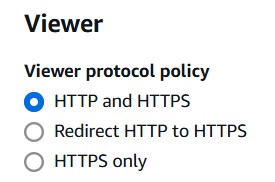
Scroll down to the viewer and select your desired “Viewer protocol policy”. Any of these will work so it is up to you.
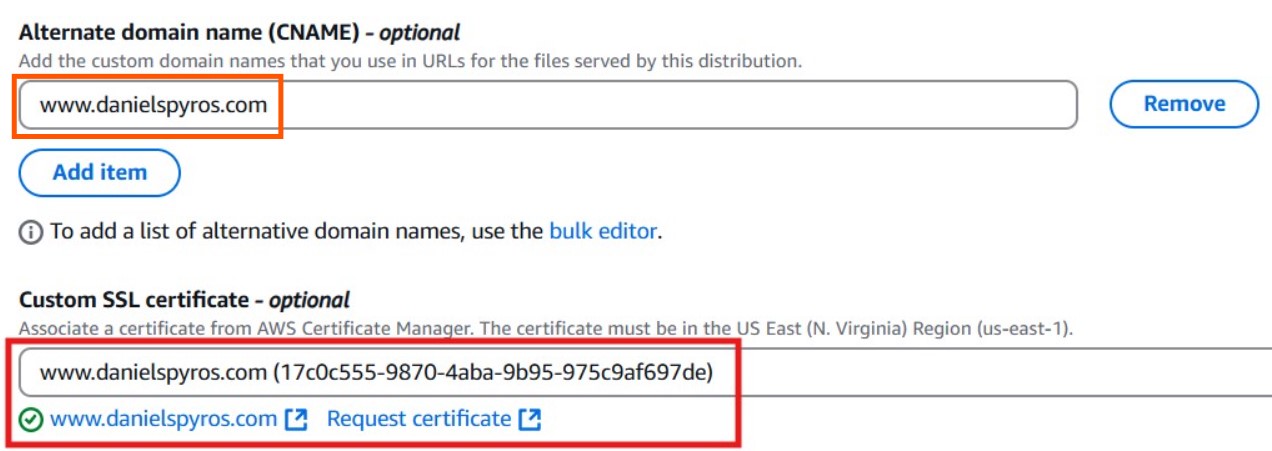
Continue scrolling down and set an alternative domain name. You will also need to choose the certificate that we created in step 1. Notice that it says “The certificate must be in the US East (N. Virginia) Region (us-east-1).” I wasn’t making things up.
Before you click “Create Distribution”, you will need to select an option for the Web Application Firewall. Let’s leave it disabled for now as it costs and our site is only static pages with no forms.
Once you click create, the distribution should now start deploying, this can take a few minutes. You can see its status here:

It will change to a date once it has finished.
3. Creating the alias to the cloudfront distribution
If you followed the previous tutorial, you will have created an alias in Route 53 that linked your S3 bucket to the domain. You can either edit this record to point it to the CloudFront distribution instead, or delete this record and create a new one pointing to the CloudFront distribution.
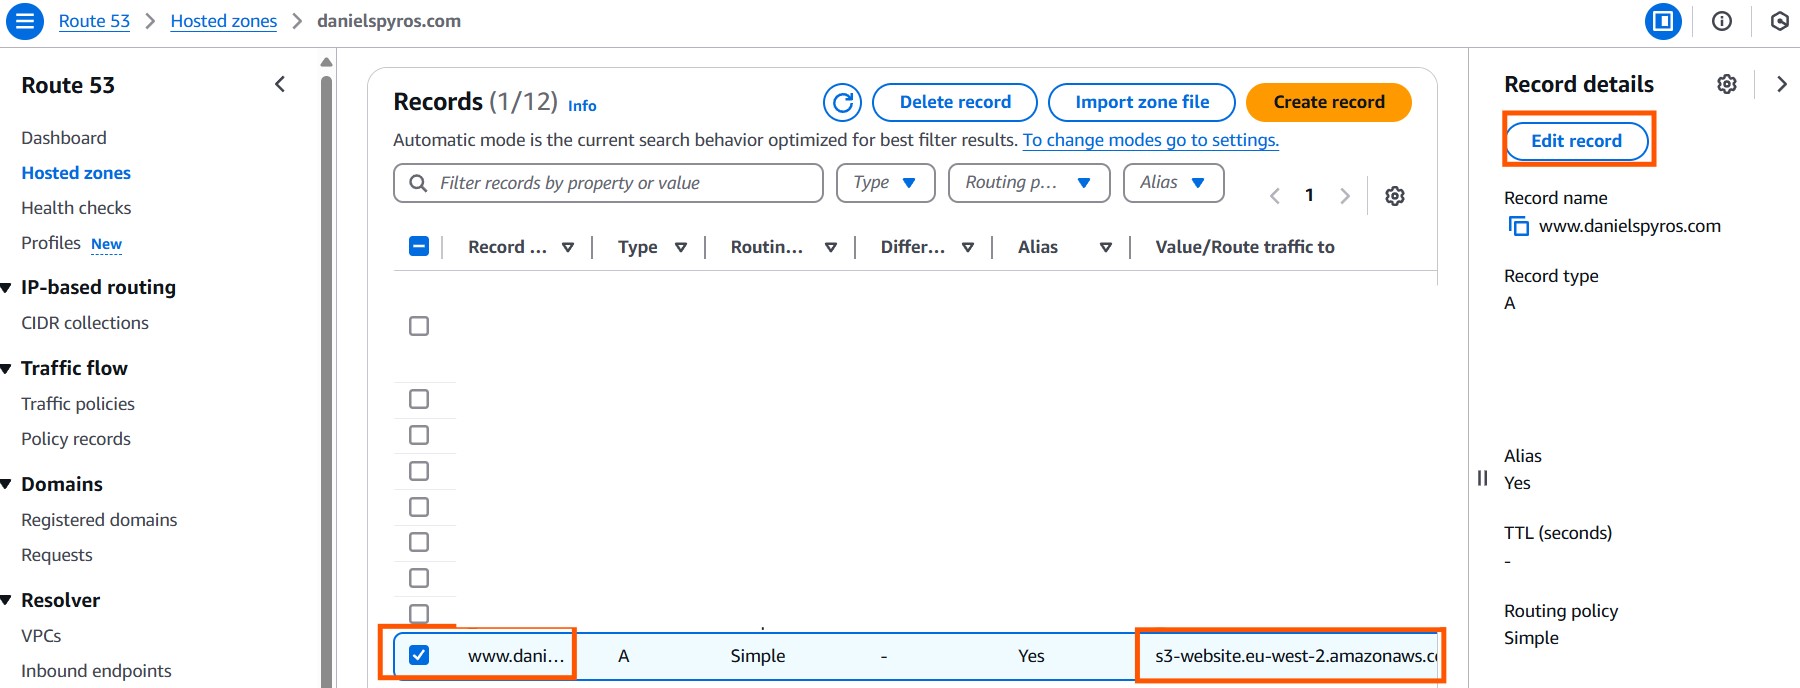
Route traffic to an “Alias to CloudFront distribution” and select your distribution.
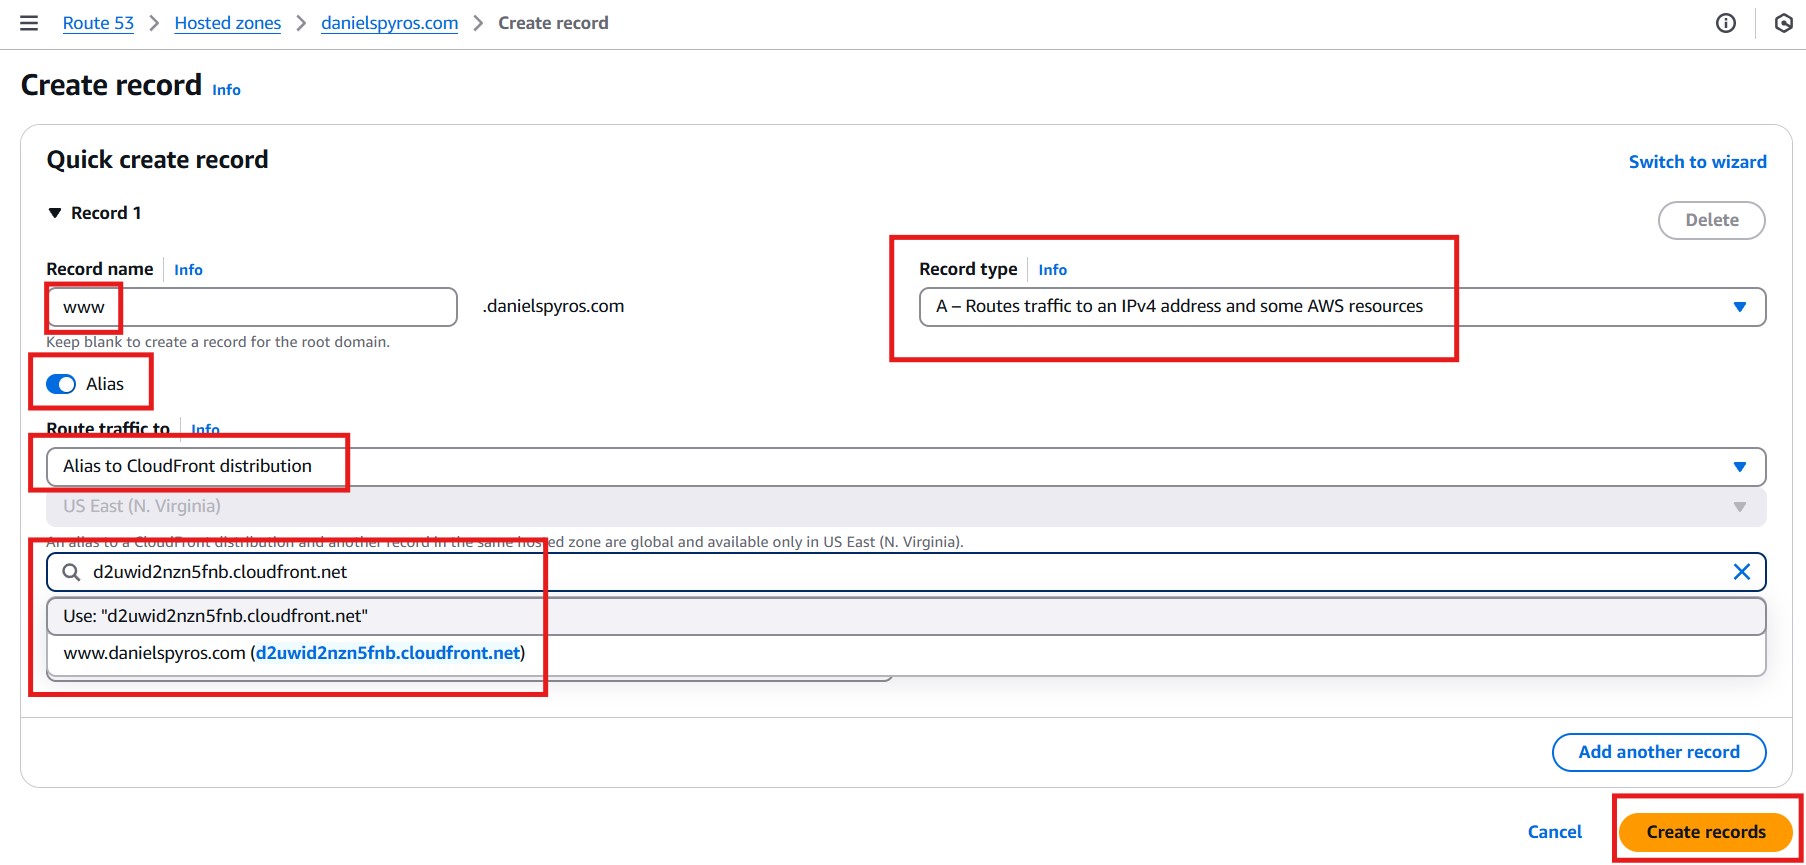
Create the records. They will take a few minutes to propagate, but hopefully it’ll be done by the time we finish the next step.
4. Modifying S3 Bucket Permissions
Go to your distribution in CloudFront and copy the ARN of your distribution. Paste it in Notepad as we will need it shortly.

“E18A9KTZH1BYBA” is the distribution id and “123456123123” is the account ID.
Go to S3 and go to your bucket permissions. Edit the permissions to add the AllowCloudFrontServicePrincipal. You will need to replace the ARN with the ARN to your distribution. It should look something like this:
1
2
3
4
5
6
7
8
9
10
11
12
13
14
15
16
17
18
19
20
21
22
23
24
25
26
27
{
    "Version": "2008-10-17",
    "Id": "PolicyForCloudFrontPrivateContent",
    "Statement": [
        {
            "Sid": "AllowCloudFrontServicePrincipal",
            "Effect": "Allow",
            "Principal": {
                "Service": "cloudfront.amazonaws.com"
            },
            "Action": "s3:GetObject",
            "Resource": "arn:aws:s3:::www.danielspyros.com/*",
            "Condition": {
                "StringEquals": {
                    "AWS:SourceArn": "arn:aws:cloudfront::[ACCOUNT_ID]:distribution/[DISTRIBUTION_ID]"
                }
            }
        },
        {
            "Sid": "AllowPublicReadAccess",
            "Effect": "Allow",
            "Principal": "*",
            "Action": "s3:GetObject",
            "Resource": "arn:aws:s3:::www.danielspyros.com/*"
        }
    ]
}
5. Visiting your website.
Go to your website. If you did not select “Redirect HTTP to HTTPS” make sure you specify HTTPS in the address bar.
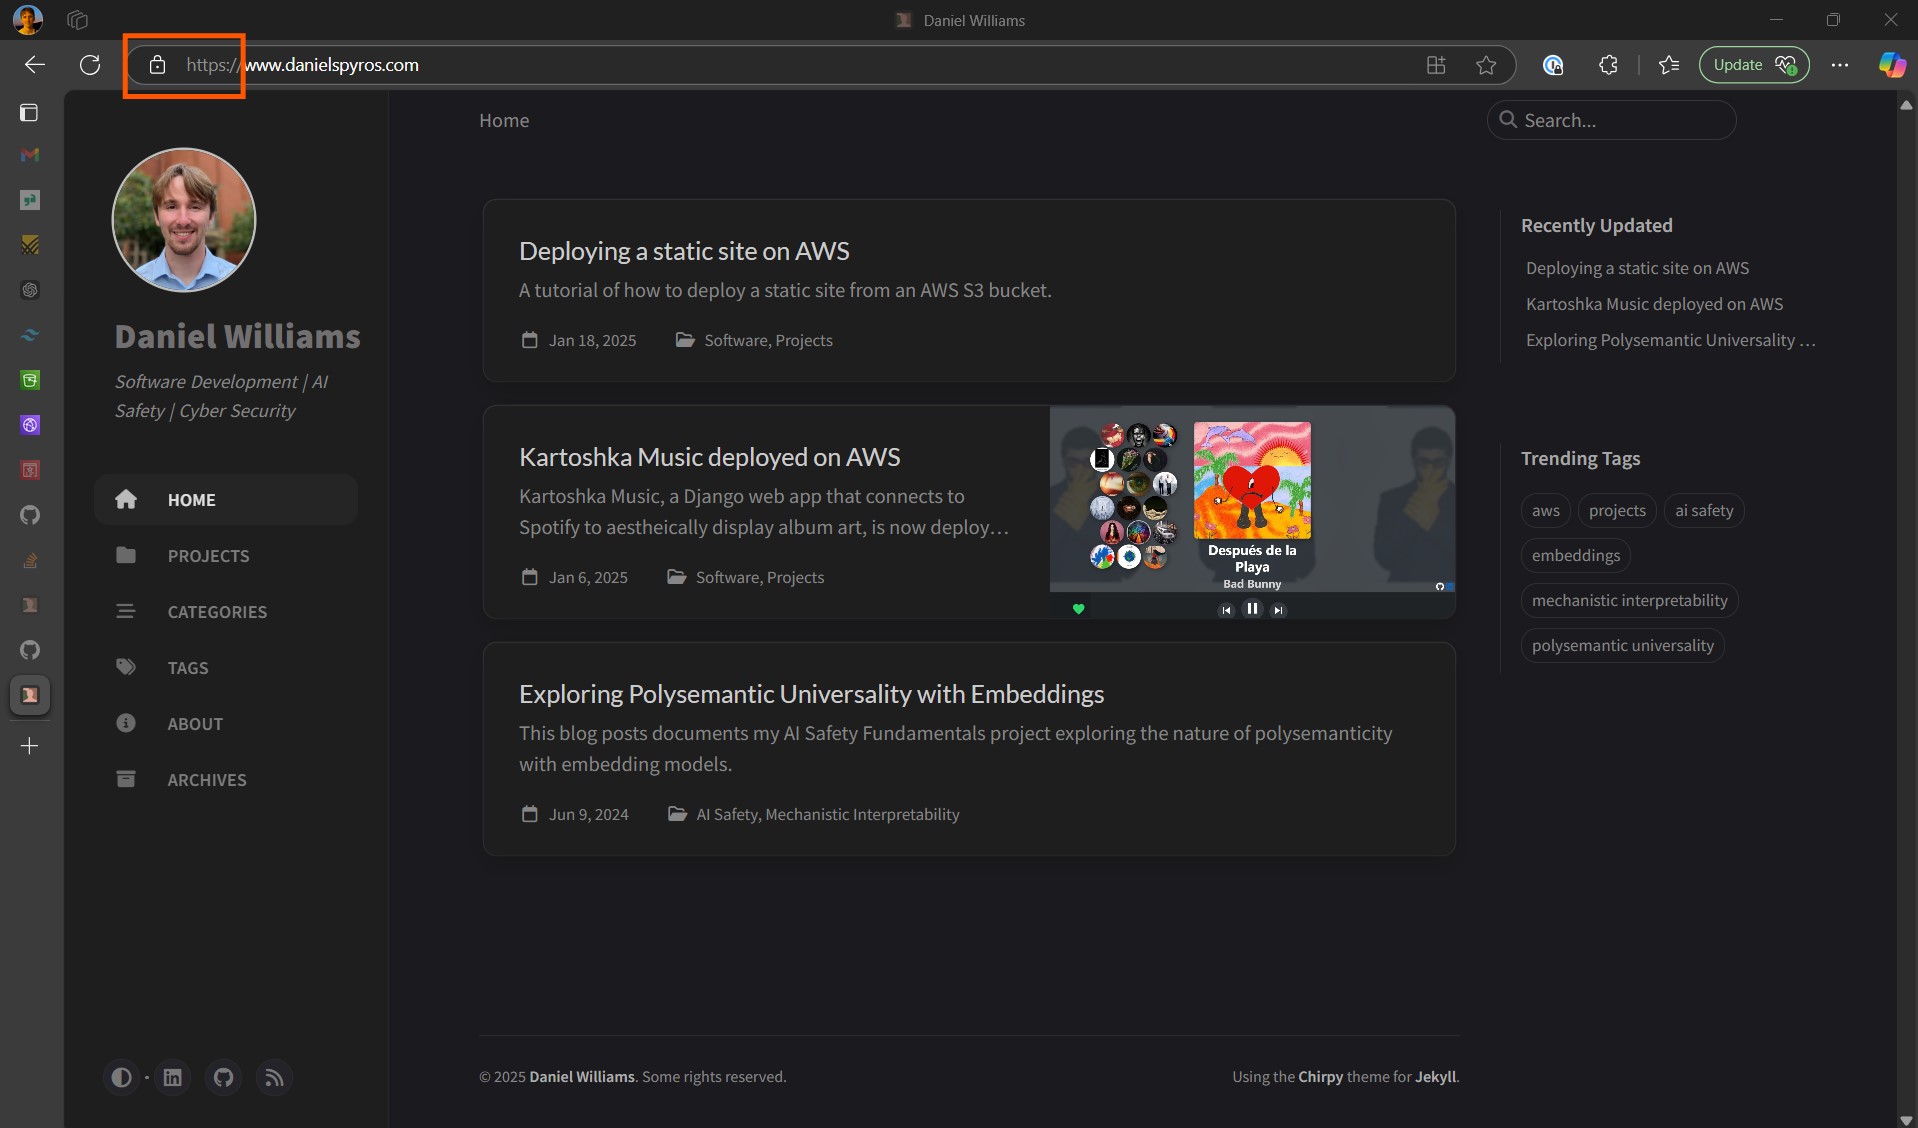
And there you have it, the site is being served over HTTPS.
In the next tutorial, I will show you how to automate it with Github Actions CI/CD Pipelines.